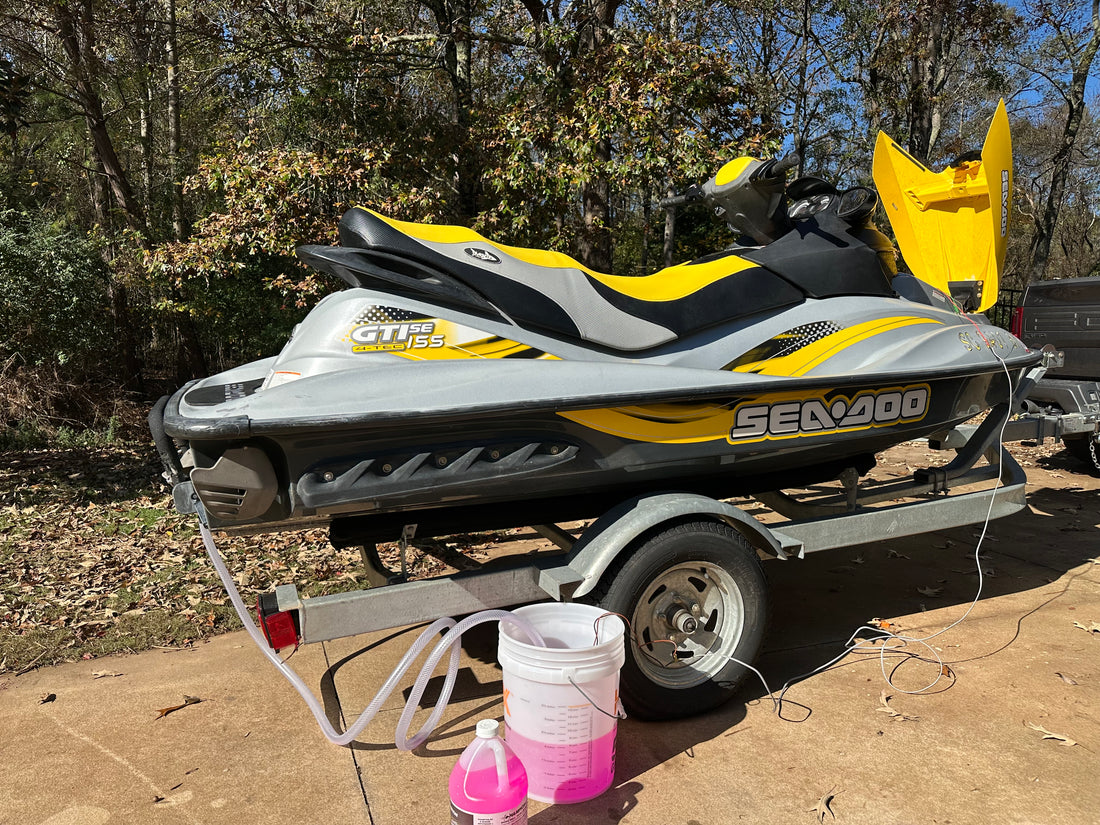
Winterizing your Sea-Doo or any personal watercraft (PWC) with a closed-loop cooling system is essential for maintaining performance and preventing damage during storage. Here’s a detailed step-by-step guide to winterizing, using a 2007 Sea-Doo GTI SE 155 as an example. This guide applies to most Sea-Doo models and other jet skis with closed cooling systems (which use coolant for the engine and raw water to cool the exhaust).
Step 1: Add Fuel Stabilizer
The first step in winterizing is to treat the fuel. Start by adding fuel stabilizer to prevent the fuel from breaking down over the winter months, which can lead to varnish and gumming in the fuel system.
-
Select the Right Fuel Stabilizer: Choose a high-quality fuel stabilizer, following the instructions for the amount needed per gallon. Sea-Doos generally hold between 10–15 gallons, so adjust based on your tank size. For my 2007 Sea-Doo GTI SE 155 with a 15.9-gallon tank, I treated it for 16 gallons.

-
Fill Up with Non-Ethanol Fuel: I prefer to fill the tank with non-ethanol fuel to prevent issues caused by ethanol separation and moisture build-up. This also makes it easy to calculate the right amount of stabilizer.
-
Mix and Distribute the Stabilizer: Here’s an example of the product I used:

Step 2: Run the Jet Ski
After adding the fuel stabilizer, run your jet ski for a few minutes to ensure that the treated fuel circulates through the fuel lines and injectors. You can do this in two ways:
- On the Water: Running the jet ski on the water for a short ride allows the stabilizer to mix thoroughly.
-
On the Hose: If you’re using a hose, follow these steps:
- Connect the hose to the water intake on the back of your Sea-Doo.
- Start the engine first, then turn on the water supply.
- Let it run for a few minutes to ensure full distribution.
- Important: Always start the engine before turning on the water to avoid water flooding back into the engine, which can cause hydrolock.
Step 3: Flush the Raw Water System with Antifreeze
Protecting the raw water system from freezing is crucial in areas where temperatures drop below freezing. Here’s how to properly flush your system with marine or RV antifreeze (typically rated to -50°F).
-
Get the Right Equipment:

- Antifreeze: Use marine or RV antifreeze that’s non-toxic and specifically rated for freezing temperatures.
- Pump Setup: I used a 5-gallon bucket filled with antifreeze and a 12V bilge pump wired to the Sea-Doo’s battery. Alternatively, you can gravity feed the antifreeze from a bucket positioned higher than the jet ski’s engine.
-
Hook Up to Raw Water Intake:

- Attach a standard garden hose adapter to your pump’s outlet and connect it to the raw water intake on the back of the Sea-Doo.
-
Flush with Antifreeze:
- Start the Engine First: This is critical to prevent hydrolocking.
- Activate the Bilge Pump: Once the engine is running, turn on the bilge pump. You should see the pink antifreeze being drawn into the system.
- Monitor for Clear Pink Exhaust Output: Keep the engine running until you see a steady stream of pink antifreeze flowing out of the exhaust. This indicates the entire water system has been flushed. I used approximately 2 gallons of antifreeze for this process.
- Shut Down in Proper Sequence: Turn off the bilge pump first, then shut off the engine to prevent any residual antifreeze from flooding back into the engine.
Step 4: Inspect the Hull for Water and Clean the Interior
After flushing with antifreeze, check the hull’s interior for any water. Draining it will reduce any risk of freezing damage to the hull. If necessary, use a sponge or towel to remove remaining water in the bilge area.
Step 5: Fog the Engine
Fogging the engine helps prevent internal rust and corrosion on cylinder walls during storage.
- Remove the Spark Plugs: Use a spark plug wrench to remove each plug carefully.
- Spray Fogging Oil: Insert fogging oil spray into each cylinder and spray generously.
- Crank the Engine: Turn the engine over (without starting it) for a few seconds. This helps spread the oil evenly on the cylinder walls for thorough coverage.
- Replace Spark Plugs: Reinstall the plugs to complete the fogging process.
Additional Winterizing Tips
Some people prefer to change the oil and replace the spark plugs at winterization, but I prefer to wait until spring to get the Sea-Doo ready for the new season. Changing the oil in spring provides fresh lubrication, ensuring the engine is at its best right before use.
Final Checklist
- Add fuel stabilizer to a full tank of non-ethanol fuel.
- Run the engine to circulate the stabilized fuel.
- Flush the raw water system with marine/RV antifreeze.
- Fog the engine cylinders.
- Check and dry the hull.
Winterizing your Sea-Doo will help it last longer and perform optimally when you’re ready to hit the water again.

